Disclosure: This post contains affiliate links. As an Amazon Associate, I earn from qualifying purchases.
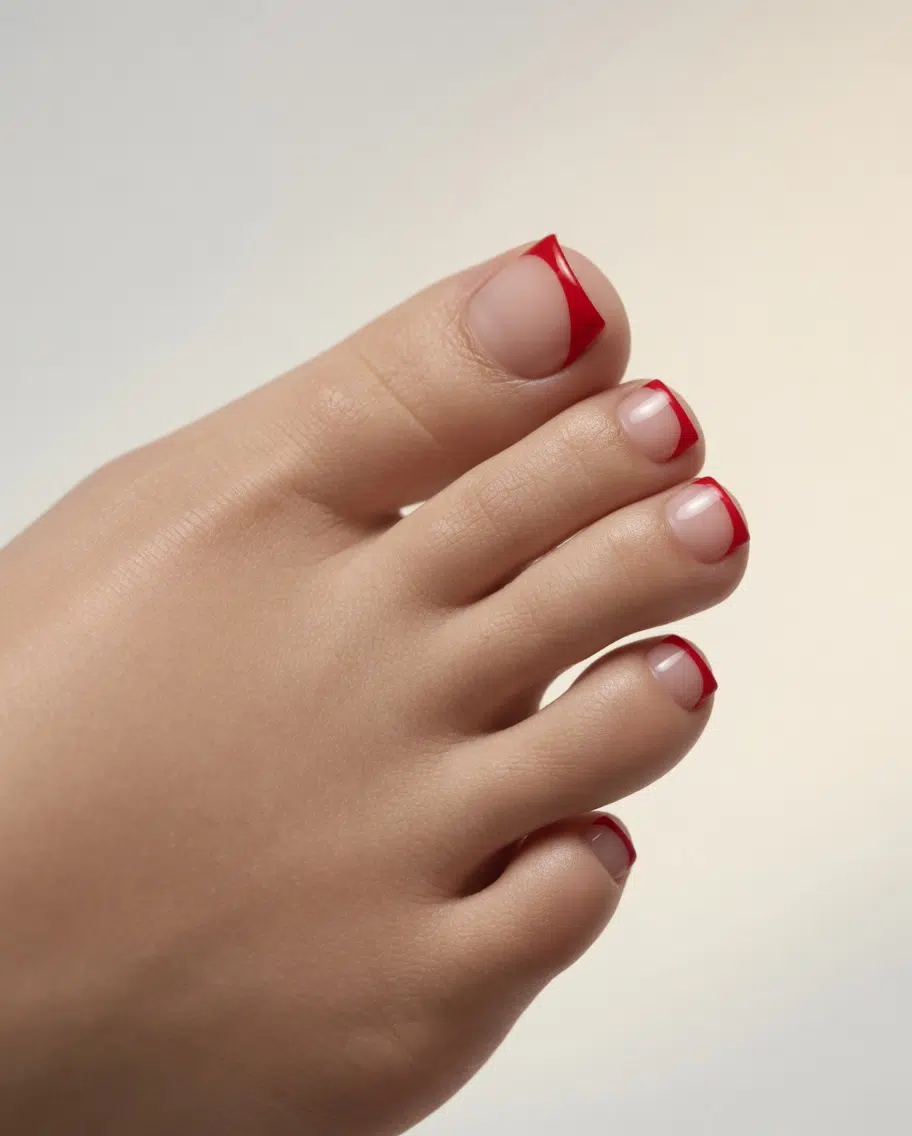
Learning how to do French tips on toes is easier when you keep the design thin, clean, and simple. Toenails are smaller than fingernails, so the French line should not be too thick or too deep. A sheer base, a steady hand, and a glossy top coat can make the whole pedicure look much more polished.
This guide keeps the process beginner-friendly. You can use a liner brush, guide stickers, or regular nail polish, depending on your comfort level. Once you understand the basic steps, you can keep the look classic or use it as a base for softer French tip toes styles. For more inspiration before choosing your final look, explore the complete French tip toes guide.
If you want to know how to do French tips on toes at home, the key is to work with thin layers, a soft base color, and a clean white edge instead of trying to paint a thick French line.
Table of Contents
What You Need for an At-Home French Pedicure
To do French tips on toes at home, you only need a few simple products: a sheer pink base, a white gel polish for the tips, a glossy top coat, and a UV LED lamp if you are using gel polish.
For a soft salon-style base, start with a sheer pink gel polish. Then use a white gel polish to create the clean French tip line. To make the pedicure last longer and look glossy, apply a base coat and top coat set. If you are working with gel polish, cure each layer with a UV LED nail lamp.
How to Do French Tips on Toes Step by Step
To do French tips on toes at home, you only need a few basic tools: a nail file, a buffer, a base coat, sheer nude or pale pink polish, white polish, a thin liner brush or French tip guides, a cleanup brush, nail polish remover, and a glossy top coat.
If you are using gel polish, you will also need a gel base coat, gel colors, gel top coat, and a curing lamp. The steps are similar, but you must cure each gel layer according to the product instructions.
For beginners, guide stickers are usually the easiest method. For a cleaner salon-style finish, a fine liner brush gives more control over the curve of the white tip.
Prep and Shape Your Toenails
Start with clean, dry toenails. Trim the nails neatly, then file them into a soft square or gently rounded shape. Avoid leaving toenails too long, because long toenails can feel uncomfortable in shoes and make the French tip look heavier.
Gently push back the cuticles and lightly buff the nail surface. This helps the polish sit more smoothly and makes the final pedicure look cleaner. Wipe away dust or oil before applying any polish.
Good prep matters because French tips are minimal. There is no bold color or heavy design to hide uneven edges, dry cuticles, or rough nail texture.
Apply a Sheer Base Color
Apply a thin base coat first. Once it dries, add one or two thin coats of sheer nude, pale pink, or milky polish. This base gives the toes a clean look and helps the white tip stand out without looking harsh.
The base should not be too opaque. A soft, translucent color usually looks more natural on toes than a heavy pink or white base. Let the base dry fully before drawing the French tip line.
If the base is still tacky, the white tip can drag, smear, or lose its clean edge.
Create the French Tip Line

Use white polish to create the French tip at the edge of each toenail. The easiest way is to start with the big toe, because it has the most space. Keep the line thin and slightly curved, following the natural shape of the nail.
If you are using a liner brush, place a small amount of white polish on the brush and tap the tip gently from one side to the other. You can create a soft curve by starting near one corner, moving toward the center, then repeating from the other side.
Do not make the white tip too thick. On small toenails, a heavy white edge can look dated or bulky. A thin or medium French line usually looks more modern and flattering.
Clean Up the Smile Line
After drawing the tip, clean the smile line before the polish fully sets. Dip a small cleanup brush in nail polish remover and gently correct any uneven edges.
This step is what makes the pedicure look neat. Even if the first line is not perfect, a cleanup brush can sharpen the curve and remove extra polish from the skin.
Take your time on the big toes first. The smaller toes do not need a dramatic curve; a tiny, clean edge is enough.
Seal With a Glossy Top Coat
Once the tips are dry, seal the pedicure with a glossy top coat. This smooths the base and tip together, adds shine, and helps protect the white edge from chipping.
Let the top coat dry completely before putting on socks or closed shoes. French tips can smudge easily if the polish is still soft, especially on the big toe.
A high-shine finish makes French tips on toes look fresher and more salon-like, even when the design is simple.
Easy French Tip Methods for Beginners

If freehand feels difficult, use French tip guide stickers. Place the sticker under the free edge of the nail, leaving only the tip exposed. Paint the exposed area white, wait a few seconds, then peel the sticker away carefully.
Another beginner method is the dot-and-connect technique. Place tiny dots at the center and sides of the tip, then connect them with a fine brush. This helps you control the curve instead of trying to draw one perfect line immediately.
For regular nail polish, work slowly and let each layer dry. For gel polish, cure each layer before moving to the next step.
Common Mistakes to Avoid
The biggest mistake is making the French tip too thick. Toenails are small, so a thick white line can overpower the nail. Keep the tip thin, clean, and close to the natural edge.
Another mistake is using a base color that is too opaque or too pink. A sheer nude, pale pink, or milky base usually looks softer and more modern.
Also, avoid rushing the drying time. If the base is not dry before the tip, the white polish can drag. If the top coat is applied too heavily, it can blur the French line.
French Tip Toes Ideas to Try Next
Once you know how to do French tips on toes, you can keep the look classic or try small variations. A white tip with a sheer pink base is timeless. A milky base gives a softer finish. A colored tip makes the pedicure feel more playful for summer.
For a softer clean-girl version, try milky white French tip toes. For a brighter summer look, explore French tip toes with color. For the broader classic style, see our guide to French tips for toes.
At-Home French Pedicure Checklist
Before starting, make sure you have the basic products ready: a UV LED nail lamp, a white gel polish, a sheer pink gel polish, and a base coat and top coat set.
Try these next: French tips for toes | French tip toes | Milky white French tip toes | French tip toes with color